Accounts & setup · 36
Configure multiaccount step by step
Example: prepare accounts A, B and C inside one instance and enable rotation.
Annotated screenshot walkthrough. Every step is also written below. Download captions
Reference: client 3.2.3 with local changes · Sep 16, 2026. Some options may not be in the public download yet. Captured interface is in English.
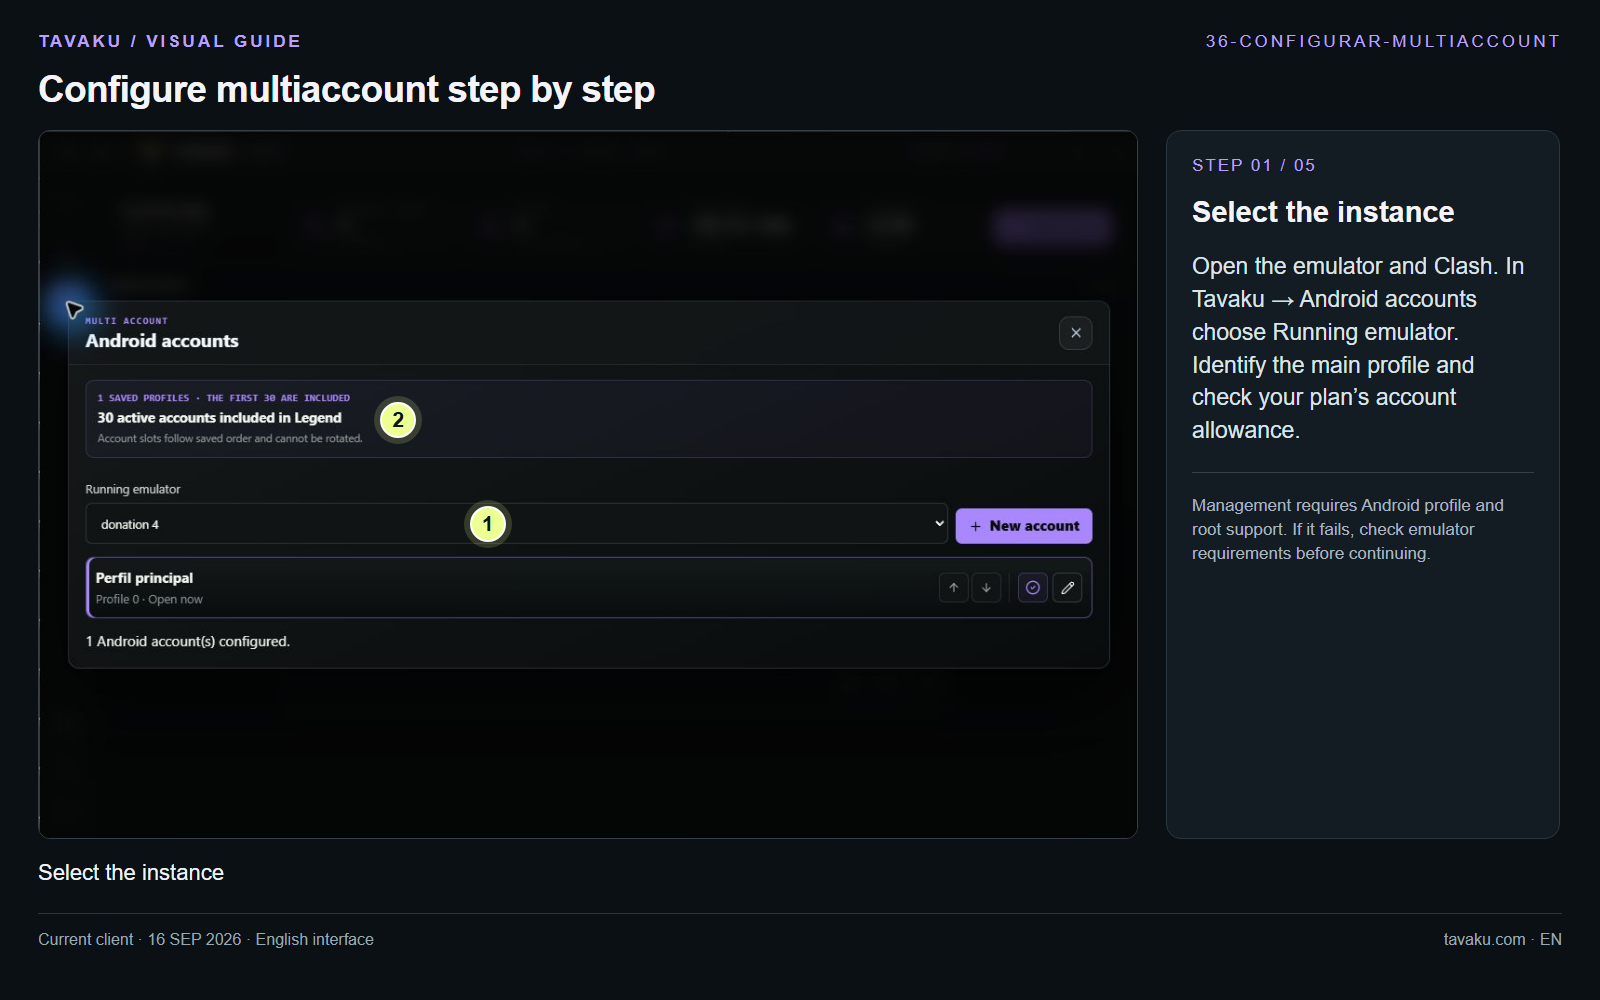
Open the emulator and Clash. In Tavaku → Android accounts choose Running emulator. Identify the main profile and check your plan’s account allowance.
Management requires Android profile and root support. If it fails, check emulator requirements before continuing.
 Enlarge image ↗
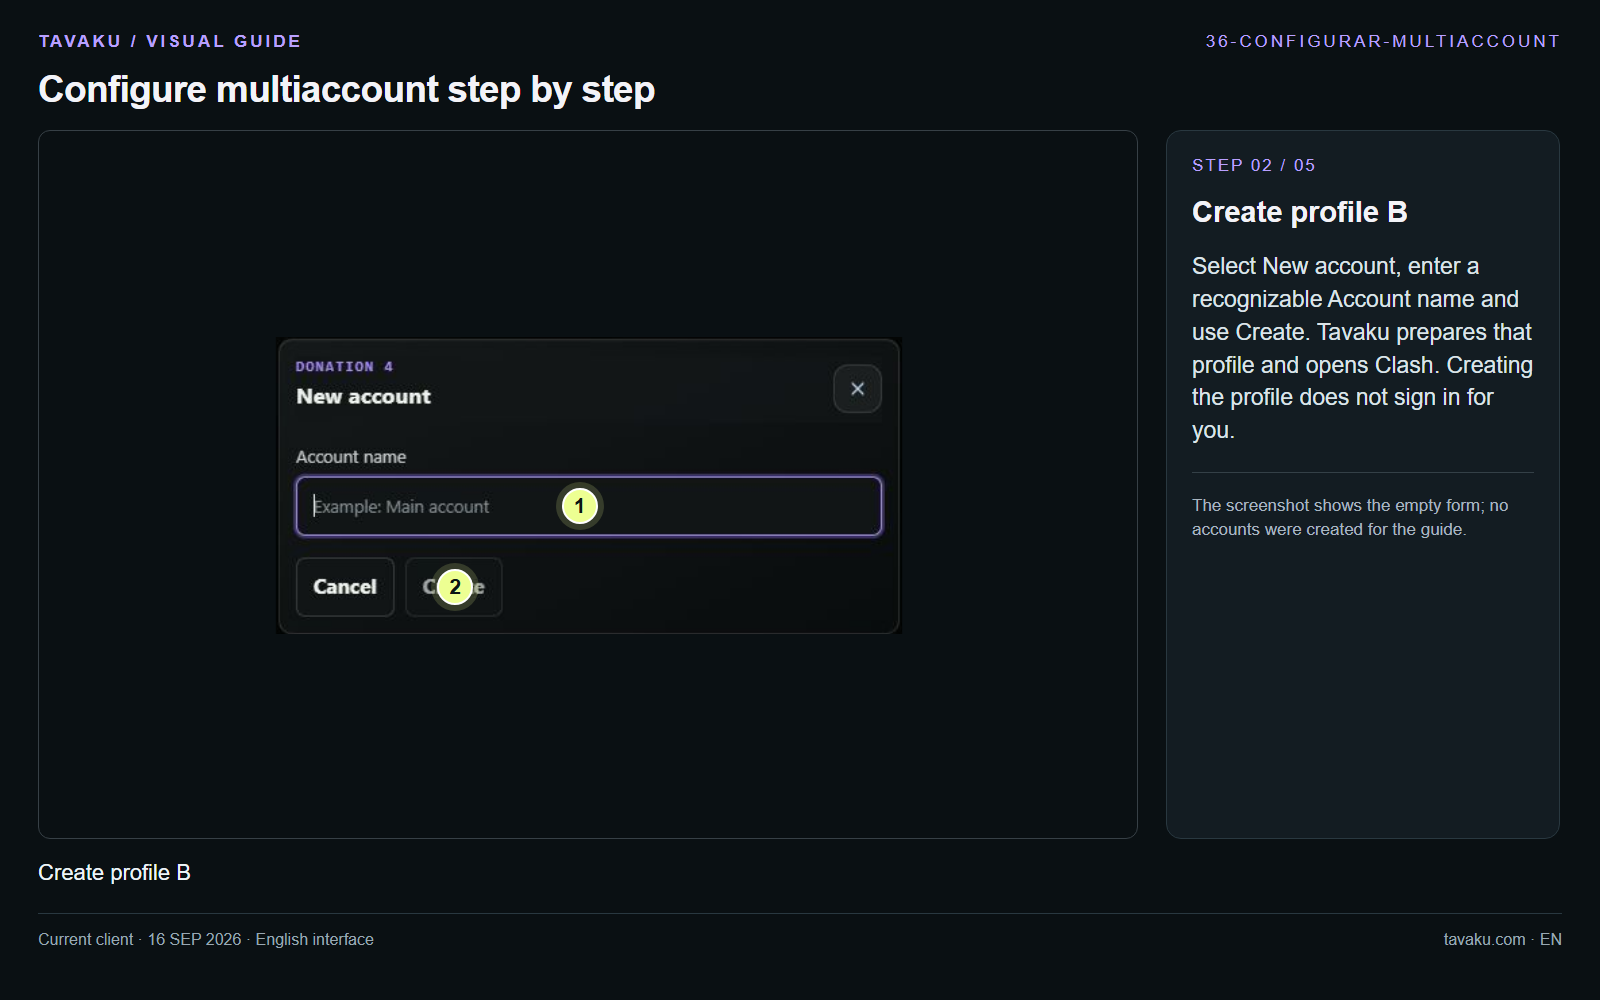
Select New account, enter a recognizable Account name and use Create. Tavaku prepares that profile and opens Clash. Creating the profile does not sign in for you.
The screenshot shows the empty form; no accounts were created for the guide.
 Enlarge image ↗
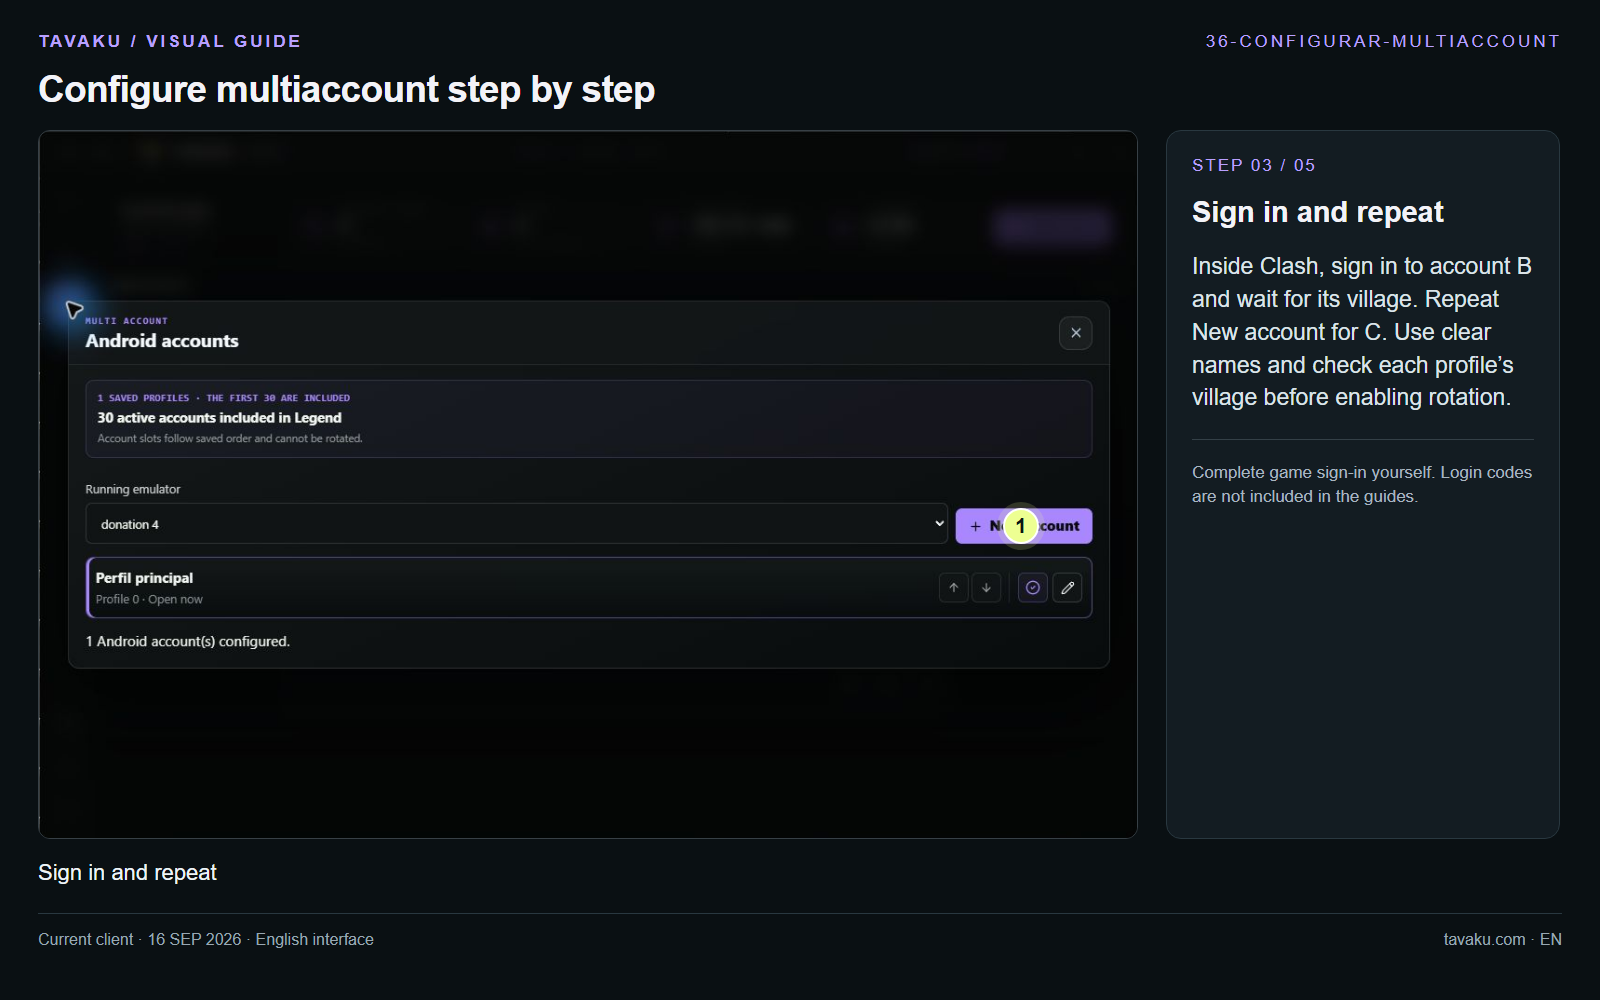
Inside Clash, sign in to account B and wait for its village. Repeat New account for C. Use clear names and check each profile’s village before enabling rotation.
Complete game sign-in yourself. Login codes are not included in the guides.
 Enlarge image ↗
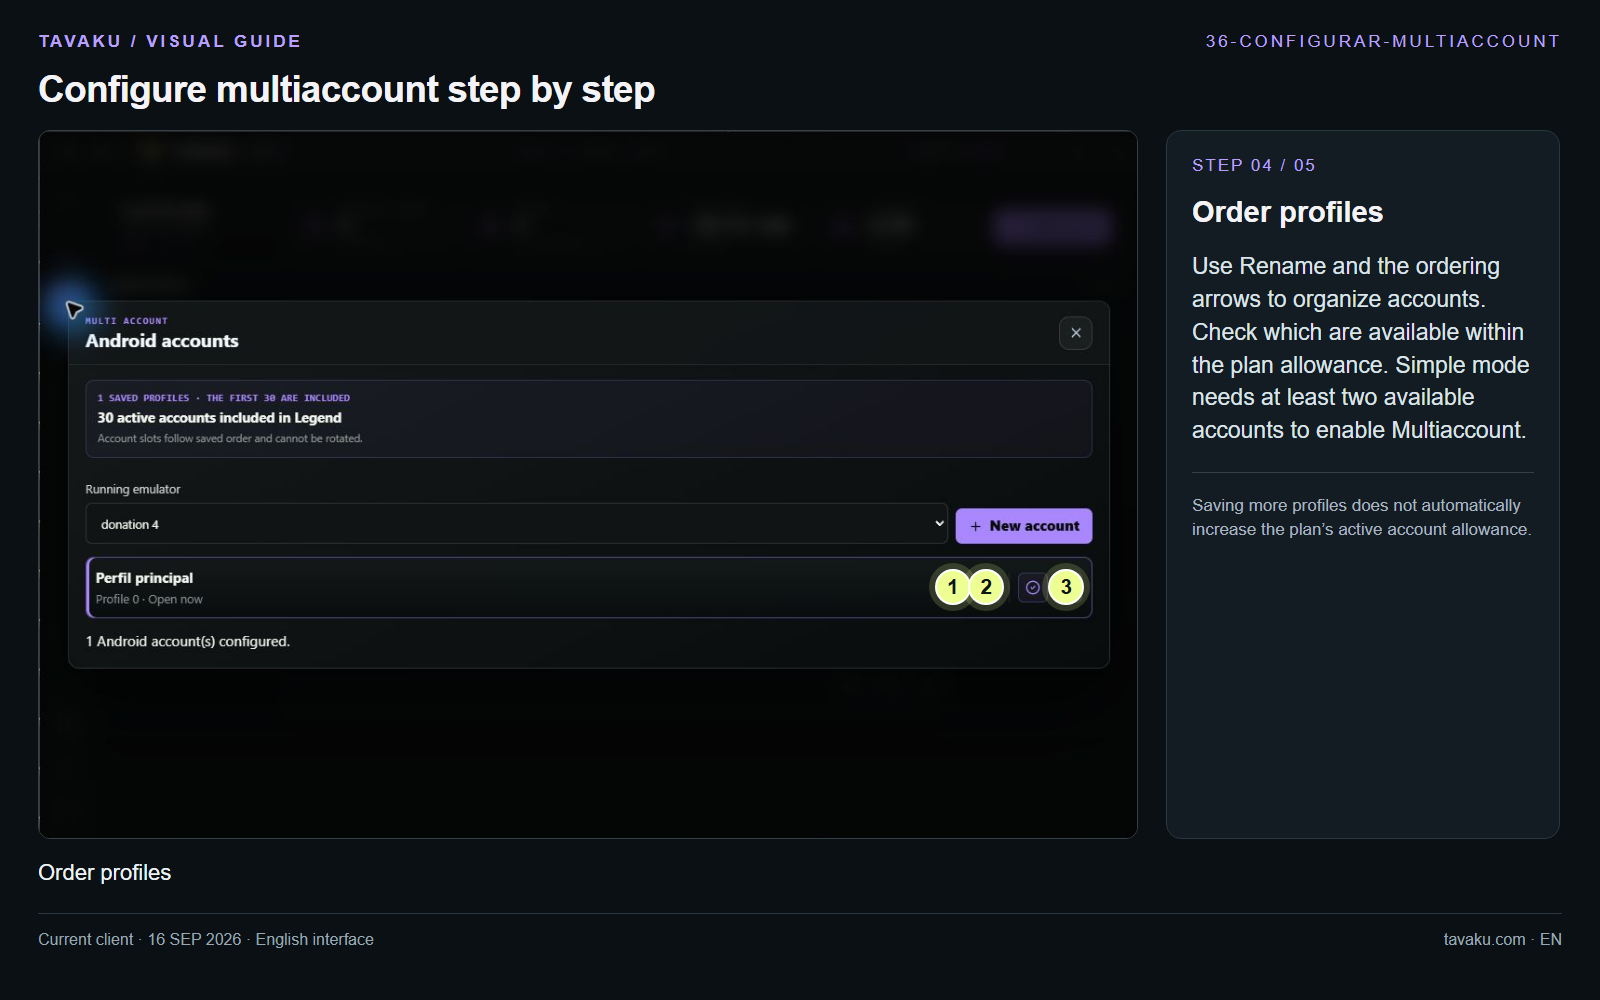
Use Rename and the ordering arrows to organize accounts. Check which are available within the plan allowance. Simple mode needs at least two available accounts to enable Multiaccount.
Saving more profiles does not automatically increase the plan’s active account allowance.
 Enlarge image ↗
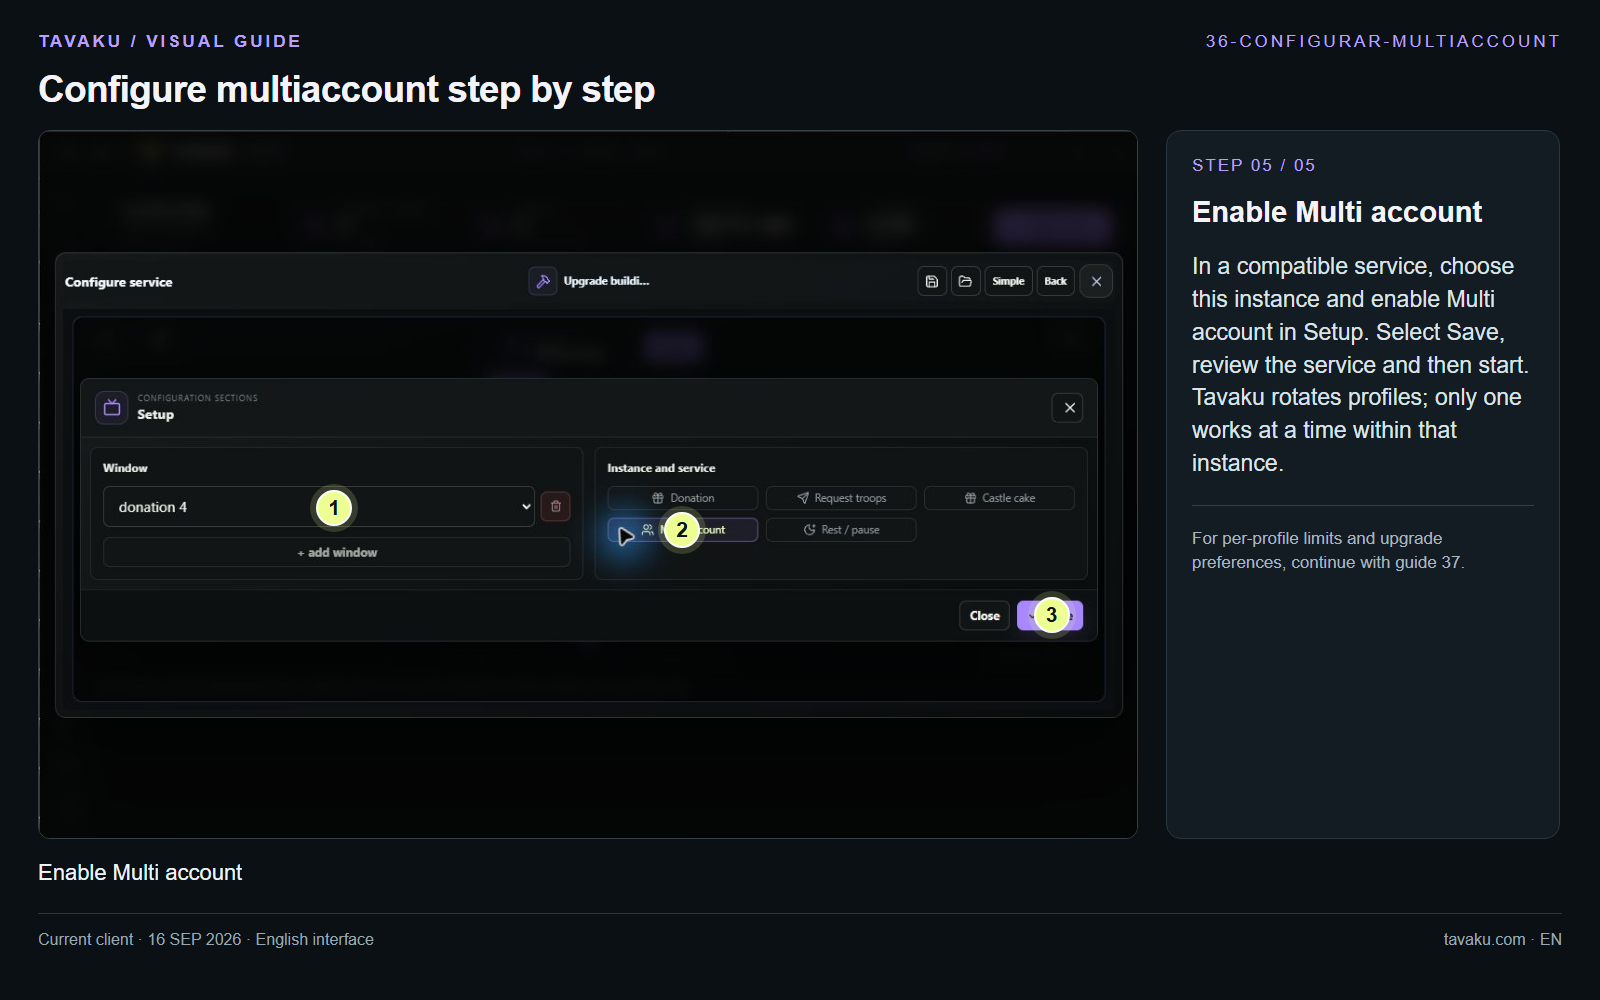
In a compatible service, choose this instance and enable Multi account in Setup. Select Save, review the service and then start. Tavaku rotates profiles; only one works at a time within that instance.
For per-profile limits and upgrade preferences, continue with guide 37.
 Enlarge image ↗
About this guide
Configuration walkthrough of the current client, including local changes. No service was started during capture.